

Learning to spot a fair trade takes more than glancing at two numbers side by side. Two offers can look close on paper and still leave one side worse off once every detail is accounted for. A good calculator gives you a starting point, but reading it correctly is what actually protects your inventory, not just the number it spits out. Small details like toggles, extras, and current demand can shift a “fair” result into a loss if you’re not paying attention. Once you know what to actually look for beyond the headline verdict, spotting a genuinely fair trade becomes second nature instead of guesswork.
What Actually Counts as a Fair Trade
A fair deal isn’t always a perfect match in numbers. It’s a trade where both sides walk away satisfied with what they received, even if the raw totals lean slightly one way. Two traders can look at the exact same offer and reach different conclusions about fairness, which is why context always matters as much as the raw calculator output.
Balancing Value on Both Sides
Start by learning to balance both sides of a trade at a glance. Add up everything offered, then everything requested, and compare the two totals before looking at the final verdict the calculator gives you.
Why Number Matching Isn’t Everything
Avoid number matching only as your sole test of fairness. Two trades with identical totals can feel completely different once you factor in how easy each item is to resell later.
Considering Physical vs Permanent Differences
Always double-check which version is on the table. A value difference between physical and permanent versions of the same fruit can quietly turn what looks fair into a real loss if you’re not paying attention.
Factoring in Extra Items or Robux
Factor in extra items like accessories, gamepasses, or added Robux before trusting a fruit-only comparison. These additions shift the real balance even when the main fruits look evenly matched.
Recognizing a Slightly Unbalanced Offer
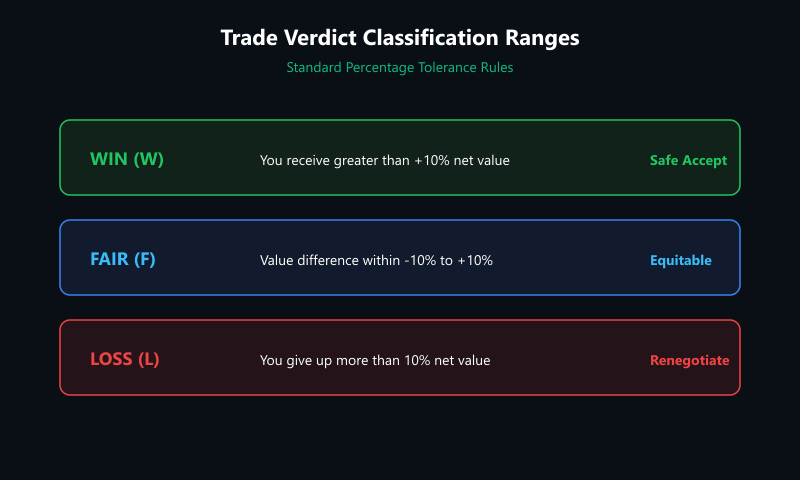
Not every gap means walk away. A percentage range within a small tolerance is often still considered reasonable, especially when the item is hard to find or one side is offering faster convenience. Experienced traders often accept a small gap without hesitation when the item they’re receiving is harder to find, since liquidity and rarity can outweigh a few percentage points on paper.
| Verdict Type | What It Usually Means | Recommended Action |
|---|---|---|
| Win | You're receiving more relative value | Safe to accept |
| Fair | Both sides are close, within tolerance | Generally safe to accept |
| Loss | You're giving up more relative value | Reconsider or renegotiate |
| Incomplete result | Missing item data, recheck entries | Re-enter items and recheck |
When to Walk Away From a Trade
Know when to walk away the moment a trade feels rushed or the other side won’t explain a big value difference. Pressure and unclear reasoning are bigger warning signs than the numbers themselves.
Using the Calculator as a Guide, Not a Rule
Use the calculator as a guide rather than a final authority. Context — like how badly you want a specific fruit — matters too, and no tool can fully account for personal priorities.
Negotiating Based on Calculator Results
Once you know the value tolerance, use it to negotiate based on results. Pointing to a specific percentage difference gives your counteroffer real weight instead of sounding like a guess. Staying calm and specific during this conversation usually gets better results than simply refusing the trade outright, since most traders are willing to adjust once they see the numbers laid out clearly.
Confirming Fairness Before Finalizing
Before you accept, confirm fairness before accepting by reviewing both the calculator verdict and the actual trade window one final time. That last check catches the small mismatches a quick glance often misses.